Have you ever wanted to know how to create those fancy autocomplete widgets in Flutter? Well, today we are going to learn how. In this step-by-step tutorial, we'll delve into making calls to the RxTerms API and fashion a Flutter widget that suggests medications in a dropdown list as users type. The best part? We'll do it without relying on external dependencies.
Step 1: Create a Flutter Project
If you haven’t already, open up a terminal and create a new Flutter project using the following command:
flutter create medication_autocomplete
From there, open the project with your favorite IDE (Integrated Development Environment). I use Visual Studio Code.
Step 2: Add Dependencies
Open your pubspec.yaml file and add the following dependency:
dependencies:
  http: ^1.1.0
Run flutter pub get to fetch the dependency. The http dependency will allow us to make HTTP requests.
Once you have the project folder opened, open up the main.dart file, which is located within the lib folder. You'll encounter a bunch of code that Flutter generously provides as our starting point. However, not all of this code is necessary for our needs. Let's streamline it into a more condensed version that suits our requirements.
dart
import 'package:flutter/material.dart';
void main() {
runApp(const MyApp());
}
class MyApp extends StatelessWidget {
const MyApp({super.key});
@override
Widget build(BuildContext context) {
return MaterialApp(
title: 'Medication Autocomplete Demo',
theme: ThemeData(
colorScheme: ColorScheme.fromSeed(seedColor: Colors.deepPurple),
useMaterial3: true,
),
home: const SizedBox(),
);
}
}
If we then run our app within a simulator, you'll see a black screen. This occurs because we have a SizedBox widget as the placeholder widget for the home property of the MaterialApp widget. Don't worry about it for now. We will create the widget that will replace the SizedBox placeholder in the next step.
Step 3: Create the Necessary Files and Folder Structure
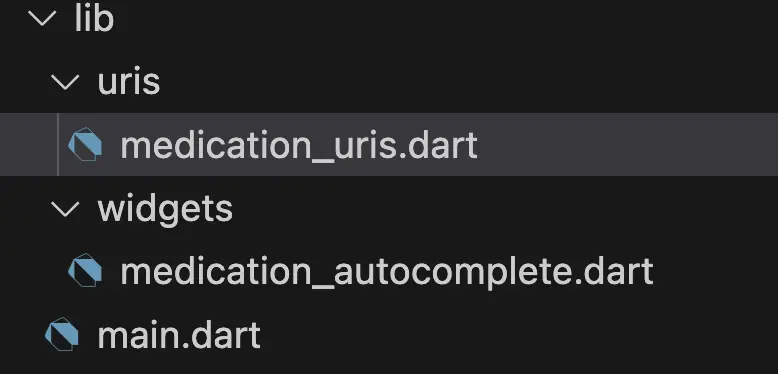
Now, create a new folder called widgets and a new Dart file called medication_autocomplete.dart. Place the newly created Dart file within the widgets folder. The medication_autocomplete.dart file is where we'll create the widget enabling us to type into a search bar and display the search results from the API in a list.
Next, create another folder called uris and a file called medication_uris.dart. This is where we will create the URI needed to make our API request.
Here's what the folder structure should look like so far in the lib folder.
Step 4: Build the Required URIs
Now open up the medication_uris.dart file, and let's begin creating the URI needed for our API request.
dart
class MedicationUris {
  /// Authority
  static const _authority = 'clinicaltables.nlm.nih.gov';

  /// Base path
  static const _baseApiPath = '/api/rxterms/v3';

  /// Additional paths
  /// Get
  static const _searchMedicationsPath = '$_baseApiPath/search';

  // ----------------------------------------------------------------

  /// Uris
  /// Get
  static Uri searchMedications(String medicationName) {
    return Uri.https(
      _authority,
      _searchMedicationsPath,
      {
        'terms': medicationName,
      },
    );
  }
}
We create a class called MedicationUris, which will hold all of the URIs necessary for our project. On lines 3 and 6, we declare two constants: _authority and _baseApiPath. The _authority constant is the server DNS host name. The _baseApiPath is a path that all of our URIs will start with. Moreover, on line 10, we create another constant called _searchMedicationsPath. This is the path to the search medications endpoint. All paths declared after the "Additional paths" comment on line 8 will be appended to the _baseApiPath constant.
After that, we create a method called searchMedications. This method takes in one parameter called medicationName of type String. The searchMedications method will construct and return a URI that will allow us to make calls to the search medications endpoint provided by the RxTerms API.
Last Step: Build the Autocomplete Widget
Now, let's build the autocomplete widget. Take a look at the code below:
dart
class MedicationAutocomplete extends StatefulWidget {
  const MedicationAutocomplete({super.key});

  @override
  MedicationAutocompleteState createState() => MedicationAutocompleteState();
}

class MedicationAutocompleteState extends State<MedicationAutocomplete> {
  String _searchText = '';
  List<String> _medications = [];

  Future<void> _getMedications(String query) async {
    final response = await http.get(
      MedicationUris.searchMedications(query),
      headers: {'Accept': 'application/json'},
    );

    if (response.statusCode == 200) {
      // Parse the response and update the medications list
      final List<dynamic> data = json.decode(response.body);
      final List<dynamic> medicationNamesList = data[1] ?? [];

      setState(() {
        _medications = medicationNamesList
            .map(
              (item) => item.toString(),
            )
            .toList();
      });
    } else {
      throw Exception('Failed to load medications');
    }
  }

  @override
  Widget build(BuildContext context) {
    return Scaffold(
      appBar: AppBar(
        title: const Text('Medication Autocomplete'),
      ),
      body: Padding(
        padding: const EdgeInsets.all(16.0),
        child: Column(
          children: [
            TextField(
              onChanged: (String query) {
                setState(() {
                  _searchText = query;
                });
                _getMedications(query);
              },
              decoration: const InputDecoration(
                labelText: 'Search Medications',
              ),
            ),
            const SizedBox(height: 10),
            Expanded(
              child: _searchText.isNotEmpty
                  ? ListView.builder(
                      itemCount: _medications.length,
                      itemBuilder: (context, index) {
                        return ListTile(
                          title: Text(_medications[index]),
                          onTap: () {
                            // Handle the selected medication
                            print('Selected: ${_medications[index]}');
                          },
                        );
                      },
                    )
                  : Align(
                      alignment: Alignment.center,
                      child: Text(
                        'Please enter a search term',
                        style: Theme.of(context)
                            .textTheme
                            .displayMedium
                            ?.copyWith(fontSize: 25),
                      ),
                    ),
            ),
          ],
        ),
      ),
    );
  }
}
We need to use a StatefulWidget because we want to update the UI (user interface) when the state changes. We declare the _searchText and _medications variables on lines 9 and 10, which are a part of the state.
On line 12, we declare the _getMedications method, which does exactly what its name suggests: it fetches our list of suggested medications based on the given query. Inside the _getMedications method, we initiate an HTTP GET request using the get function from the http package. Once we receive a response, we check the status code to ensure it equals 200, indicating a successful request. Following this, we parse the response and update the medications list.
Now let's move on to the build method. Here we create the UI you see on the screen. We use a Scaffold as the first widget because we want an AppBar. From there, we add a little padding around our UI using the Padding widget. Then, we create a Column widget. The Column widget will have the TextField, which is where the user will type into to search, and a ListView that will list the suggested medications. If we don't have any thing typed into the TextField widget, then we will show some text prompting the user to enter a search term instead of a ListView widget.

Finished!
Congratulations! You've successfully crafted an autocomplete widget in Flutter.
As you explore further, consider enhancing your widget with additional features, such as detailed medication information, custom styling, or even integrating other healthcare APIs. Flutter's flexibility empowers you to tailor the app to meet the unique needs of your users.
Remember, this tutorial is just the beginning of your Flutter journey. Continue to dive into the rich ecosystem of Flutter packages, experiment with UI elements, and explore advanced state management for more complex applications.
Feel free to share your creations, seek feedback from the Flutter community, and stay curious. The world of Flutter development is vibrant, and there's always something new to discover and implement in your projects.
Happy coding, and best of luck with your Flutter endeavors!